

DIY personalized fondue skewers
So first off, my apologies for being a bit MIA lately. Last week was quite a hectic one and I got rather behind. But I'm back now. Hi! I missed you all.
Part of the hecticness in the past week was preparing for Aaron's birthday party on Sunday. He threw me one pretty unmatchable 30th back in September, so I really wanted to up my party game a bit from the last few, which were mostly just having a couple friends over for cake. This one needed to be something a bit more special. I'll be doing a full post on it later this week, so stay tuned for that (and for the companion recipes! Earl grey chiffon cake! Fondue! Tasty cocktails! Huzzah!)

My favorite thing I did for the party was to incorporate some of Aaron's childhood photos. For his invitation, I used photoshop to pull him out of one and embellished it a bit (shown below), so I thought it would be fun to use that as a running theme for the rest of the party.

So for that, I of course turned straight to my favorite resource for such things: Social Print Studio.* I've used them for various things over the years and have always been so happy with their prints. The quality is fantastic and they have a great range of products - mini square prints we used at our wedding reception, large squares I used for my dad's 80th surprise party, and now stickers. That's right - stickers. (!!)

They sell these brilliant little sticker booklets that I'm now obsessed with. Each sticker is just shy of an inch square and the print quality is amazing. I'd been wanting to try them for awhile now, so this was the perfect chance! I kept the same theme from the invitation and modified some of my favorite Small Aaron photos in various bright colors. And this was the result:
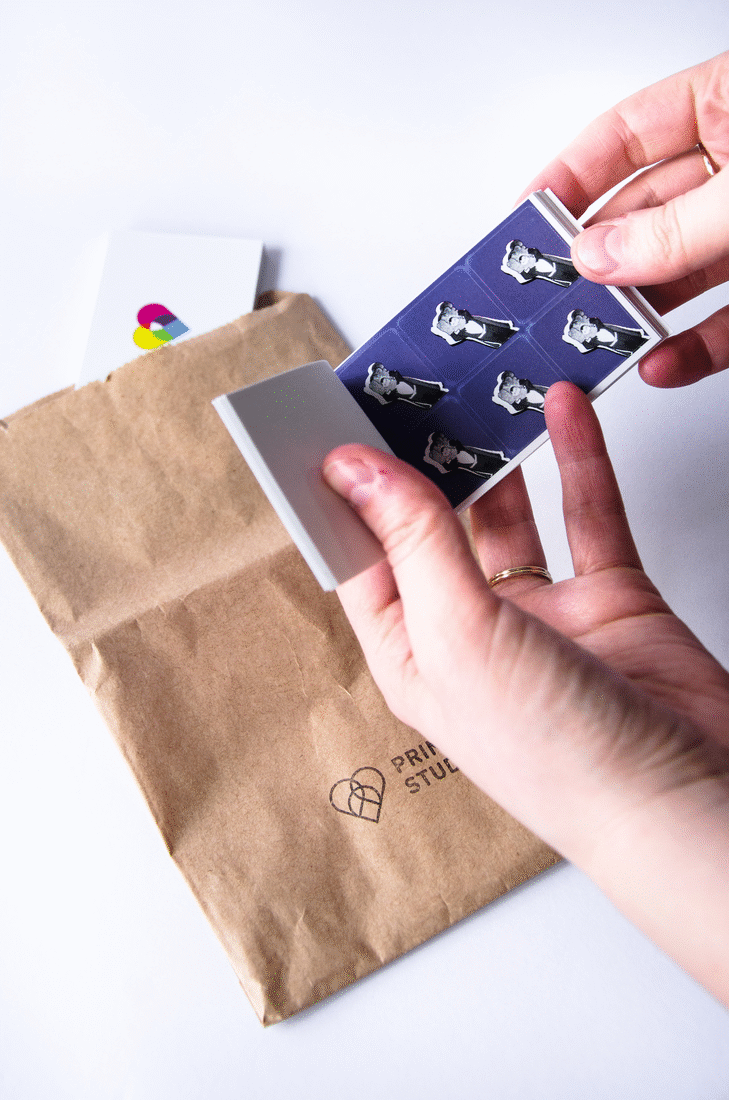
Perfection!! I was giddy when these arrived. They were exactly what I'd hoped! So the premise was this: there were enough stickers for each person at the party to "choose their favorite Aaron" and have that be their identifier for the evening. This would mark their fondue skewer, their drink glasses, and their plates. And it was so fun! Everyone loved looking through the booklet and hearing the back stories on what on earth was going on in some of these photos. Plus, he was just a pretty darn ridiculously cute kid. I know I'm biased, but seriously. Look at those giant eyes.
Anyway. Here's my DIY on how to make your own personalized fondue skewers!
*this is not a sponsored post


diy personalized fondue skewers
NEEDED SUPPLIES
bamboo skewers
cardstock
thread (in a contrasting color or colors)
sturdy needle
scissors
glue stick
tape
a pack of Social Print Studio mini stickers
INSTRUCTIONS
To start, cut strips of cardstock to your desired size. I cut out a mock-sticker so I could base my template off of that and just chose the ratio I wanted from there.
Next, bend a cardstock strip around one of the bamboo skewers to create a rounded crease at the middle. Secure this with a small piece of tape.
Thread the needle and poke it through the cardstock from the inside out (beginning on the side with the bamboo skewer). Pull the thread until only a small bit remains inside and anchor this to the cardstock with a tiny strip of tape.
Using the glue stick, deposit a patch of glue in the middle of the cardstock and press the two sides together to form a flag around the bamboo skewer.
Holding the cardstock together until the glue is secure, continue to stitch around the edges to finish the flag.
To tie off, have your final stitch go only through one piece of cardstock and come out betweek the two next to the bamboo skewer. Loop the needle back through the last stitch and use this to form a knot. Repeat to double knot and cut the thread.
Using a pencil or other small implement, poke the end of the thread back up into the inside of the flag to leave a clean edge.
Once the event is upon you, allow each guest to choose their favorite sticker and adhere it to their skewer.
BONUS! personalized drink identifiers!
NEEDED SUPPLIES
cardstock
scissors
glue stick
mini clothes pins (The Dollar Tree has some great ones)
a pack of Social Print Studio mini stickers
INSTRUCTIONS
Cut squares from the cardstock just larger than the stickers. Again, I used my mock-sticker template to gauge this.
Using the glue stick, deposit a goodly amount of glue on one flat side of the clothes pin above the hinge.
Press the cardstock square onto this until it adheres.


